Imagine never having to worry about overcooking or undercooking your Thanksgiving turkey again. With the “Cooking Times for a Perfectly Roasted Turkey” product, you can ensure that your turkey is cooked to perfection every time. This handy guide provides you with precise cooking times based on the weight of your turkey, taking all the guesswork out of the equation. No more dry turkey or undercooked meat, just a deliciously roasted bird that will impress your guests. Say goodbye to kitchen stress this holiday season with “Cooking Times for a Perfectly Roasted Turkey.”
Thawing the Turkey
Thawing the turkey is an essential step to ensure even cooking and to avoid any food safety issues. There are two methods you can use to thaw your turkey: the refrigerator method and the cold water method.
Refrigerator Method
The refrigerator method is the safest and easiest way to thaw a turkey. Simply place the turkey on a tray or in a roasting pan and place it in the refrigerator. Allow approximately 24 hours of thawing time for every 4-5 pounds of turkey. It’s important to note that you should never thaw a turkey on the kitchen counter, as this can allow bacteria to multiply rapidly.
Cold Water Method
If you need to thaw your turkey quickly, you can use the cold water method. Fill a clean sink or a large container with cold water. Place the turkey in a leak-proof plastic bag and submerge it in the water. Change the water every 30 minutes to ensure it stays cold. Allow 30 minutes of thawing time per pound of turkey. This method is faster than the refrigerator method but requires more attention and effort.
Preparing the Turkey
Once your turkey is thawed, it’s time to prepare it for roasting. This includes cleaning the turkey, removing the giblets, and seasoning the turkey.
Cleaning the Turkey
Before you begin, make sure to remove any packaging materials from the turkey, including the plastic pop-up thermometer if there is one. Rinse the turkey inside and out with cold water, and pat it dry with paper towels. This helps to remove any bacteria that may be present on the surface of the turkey.
Removing the Giblets
Most turkeys come with a bag of giblets (heart, liver, gizzard, and neck) inside the cavity. Carefully reach into the cavity and remove the giblets. You can set them aside to use in other recipes or discard them if you prefer.
Seasoning the Turkey
Seasoning is key to adding flavor to your turkey. You can choose to use a variety of seasonings, such as salt, pepper, garlic powder, onion powder, and herbs like rosemary and thyme. Make sure to season both the inside and outside of the turkey for maximum flavor. You can also consider using a marinade or brine for added moisture and flavor.

Roasting the Turkey
Roasting the turkey is the main event! It’s important to properly prepare the oven, the roasting pan, and position the turkey before you start roasting. Throughout the cooking process, basting the turkey will help keep it moist and flavorful.
Preheating the Oven
Start by preheating your oven to the recommended temperature for roasting the turkey. This is typically around 325°F (165°C). Preheating ensures that the oven is at the correct temperature from the beginning, allowing for even cooking.
Preparing the Roasting Pan
Choose a roasting pan large enough to comfortably fit your turkey. Line the bottom of the pan with aluminum foil for easy cleanup. You can also add chopped vegetables, such as onions, carrots, and celery, to the bottom of the pan to act as a natural roasting rack and add flavor to the drippings.
Positioning the Turkey
Place the turkey breast-side up on the prepared roasting pan or rack. Tuck the wings under the turkey and tie the legs together with kitchen twine. This helps to keep the turkey’s shape and promotes even cooking. Don’t forget to wash your hands thoroughly after handling raw poultry to prevent cross-contamination.
Basting the Turkey
Basting is the process of repeatedly spooning or brushing the turkey’s juices or a flavorful liquid, such as melted butter or broth, over the turkey as it cooks. This helps to keep the turkey moist and adds flavor. Baste the turkey every 30 minutes throughout the roasting process, taking care not to open the oven too frequently as this can cause temperature fluctuations.
Calculating the Cooking Time
Knowing the cooking time is essential for properly roasting your turkey and ensuring it reaches the recommended internal temperature for safe consumption. There are two methods you can use to calculate the cooking time: using the roasting time per pound guideline and using a meat thermometer.
Roasting Time per Pound
As a general guideline, you can estimate the roasting time by allowing approximately 13-15 minutes per pound of turkey. This means that a 12-pound turkey would take approximately 2.5 to 3 hours to cook. However, it’s important to note that factors like the type of oven, the shape and size of the turkey, and the desired doneness can affect the cooking time.
Using a Meat Thermometer
To be absolutely sure that your turkey is cooked to perfection, use a meat thermometer. Insert the thermometer into the thickest part of the thigh without touching the bone. The turkey is done when the internal temperature reaches 165°F (74°C). If you’re cooking a stuffed turkey, make sure the stuffing also reaches 165°F (74°C) for food safety.

Cooking the Turkey
Once you have determined the cooking time, it’s time to put your turkey in the oven! There are a few techniques you can use to achieve a perfectly cooked turkey, including starting with high heat, reducing the oven temperature, and following a basting schedule.
Initial High Heat
To help achieve a crispy golden skin, start roasting your turkey at a higher temperature, around 425°F (220°C), for the first 30 minutes. This initial blast of heat helps to seal in the juices and creates a beautifully browned exterior.
Reducing the Oven Temperature
After the initial high heat, reduce the oven temperature to the recommended cooking temperature, typically 325°F (165°C). This lower and more moderate heat allows for even cooking and helps to prevent the turkey from drying out.
Basting Schedule
As mentioned earlier, basting the turkey every 30 minutes not only helps to keep it moist but also adds flavor. Stick to a regular basting schedule throughout the cooking process, but avoid opening the oven too frequently to not disrupt the cooking time and temperature.
Using a Turkey Roasting Chart
If you want a more precise cooking time, you can use a turkey roasting chart. This handy tool takes into account the weight of the turkey and provides you with a more accurate estimate of the cooking time.
Determine the Weight of the Turkey
Start by weighing your turkey. Use a kitchen scale to get an accurate measurement. Record the weight in pounds.
Finding the Cooking Time
Using the weight of the turkey, refer to a trusted turkey roasting chart. These charts typically provide a range of cooking times based on the weight of the turkey. Find the weight of your turkey in the chart, and it will give you a recommended cooking time. Remember, this is just a guideline, and you should always use a meat thermometer to check for doneness.
Testing for Doneness
Before you serve your turkey, it’s important to ensure it is fully cooked. There are a few methods you can use to test for doneness, including checking the internal temperature, observing the color of the skin, and checking for juices.
Internal Temperature
Using a meat thermometer inserted into the thickest part of the thigh without touching the bone, check that the internal temperature of the turkey reaches 165°F (74°C). This is the safe temperature for consuming poultry. If you’re cooking a stuffed turkey, make sure the stuffing also reaches 165°F (74°C).
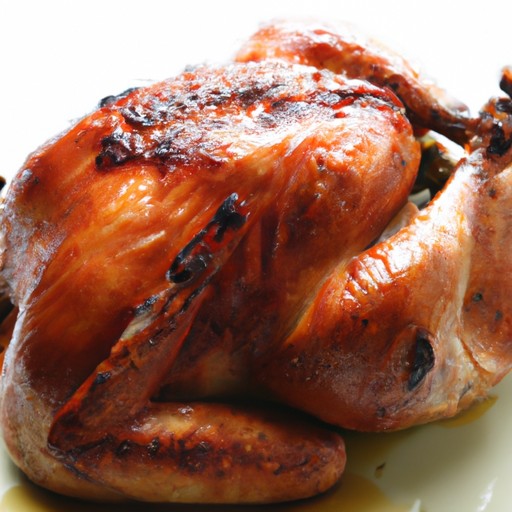
Color of the Skin
The skin of a fully cooked turkey should be golden brown and crispy. If the skin is still pale or rubbery, the turkey may need more time in the oven. However, if the skin is getting too dark, you can tent it with aluminum foil to prevent it from burning while the turkey finishes cooking.
Checking for Juice
Another sign of a fully cooked turkey is clear, not pink, juices running from the turkey when you pierce it with a fork or knife. If the juices are still pink, the turkey needs more time in the oven.
Resting and Carving
After your turkey is cooked to perfection, it’s important to let it rest before carving. This allows the juices to redistribute and ensures a moist and flavorful turkey. Here’s how to rest and carve your turkey:
Resting the Turkey
Once you remove the turkey from the oven, tent it loosely with aluminum foil and let it rest for at least 20-30 minutes. This resting period allows the turkey to retain its juices and become more tender and easier to carve. Use this time to prepare any side dishes or gravy.
Carving the Turkey
To carve your turkey, start by removing the twine or any skewers holding the legs together. Carefully lift the turkey onto a carving board. Begin by removing the legs, followed by the wings. Next, slice the breast meat across the grain into even slices.
Troubleshooting
Sometimes, despite our best efforts, things don’t go exactly as planned. Here are some common turkey-roasting issues and how to fix them:
Overcooked Turkey
If your turkey turns out dry and overcooked, there are a couple of strategies you can try. First, make sure you are using a meat thermometer to accurately gauge the turkey’s doneness. If it’s consistently overcooking, consider reducing the overall cooking time or lowering the oven temperature slightly. You can also try basting the turkey more frequently or using a foil tent to help lock in moisture.
Undercooked Turkey
If your turkey is undercooked, it’s important to put it back in the oven and continue cooking until it reaches the safe internal temperature of 165°F (74°C). Cover the turkey with foil to prevent the skin from getting too dark, and continue roasting until it is fully cooked. Keep in mind that the cooking time may vary depending on the oven temperature and the size of the turkey.
Unevenly Cooked Turkey
If parts of your turkey are cooking faster than others, this can result in uneven cooking. To remedy this, you can try rotating the turkey halfway through the cooking time. For example, if the top of the turkey is browning faster than the bottom, carefully turn the turkey over so that the breast side is now facing down. This will help even out the cooking and ensure a more evenly cooked turkey.
Tips and Tricks
To make your turkey-roasting experience even better, here are some useful tips and tricks:
Using a Roasting Rack
A roasting rack elevates the turkey off the bottom of the pan, allowing hot air to circulate evenly around the bird. This promotes even cooking and prevents the bottom of the turkey from getting soggy. If you don’t have a roasting rack, you can create one using a bed of vegetables or a coil of aluminum foil.
Adding Aromatics for Flavor
Enhance the flavor of your turkey by adding aromatics inside the cavity. Stuff the cavity with aromatics like onion halves, lemon wedges, garlic cloves, and fresh herbs like rosemary and thyme. As the turkey roasts, these aromatics will infuse the meat with delicious flavor.
Using Foil Tent
If you find that the skin of your turkey is browning too quickly, you can protect it by tenting it with aluminum foil. Simply create a loose tent using foil and carefully drape it over the turkey. This will help prevent the skin from burning while the turkey continues to cook.
Letting the Skin Dry
For a crispier skin, let your turkey sit uncovered in the refrigerator for a few hours before roasting. This helps to dry out the skin, resulting in a golden, crispy exterior. Just make sure to keep the turkey away from other foods in the refrigerator to prevent cross-contamination.
By following these comprehensive steps and tips, you’ll be well-equipped to roast a delicious and perfectly cooked turkey. Remember to always prioritize food safety by thawing the turkey properly, cooking it to the recommended internal temperature, and testing for doneness. Happy roasting, and enjoy your flavorful Thanksgiving feast!