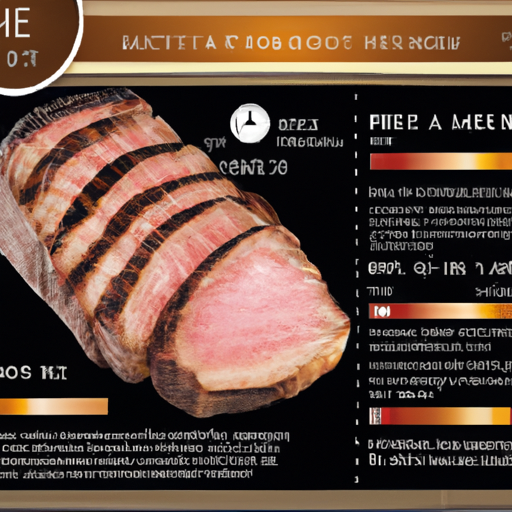
Imagine never having to worry about overcooking or undercooking a steak again. With “The Ultimate Steak Cooking Chart: Perfecting Your Steak by Thickness,” you can become a master of steak cooking. This innovative chart takes the guesswork out of preparing the perfect steak, allowing you to cook your meat to perfection every time. Whether you prefer your steak rare, medium, or well-done, this chart provides precise cooking times and temperatures based on the thickness of your cut. Say goodbye to bland or unevenly cooked steaks and say hello to a perfectly cooked, mouthwatering piece of meat every time.

Choosing the Right Thickness for Your Steak
When it comes to cooking the perfect steak, the thickness of the cut plays a crucial role. The right thickness ensures that your steak cooks evenly, allowing for a flavorful and tender result. But how do you determine the ideal thickness for your steak? There are a few factors to consider.
Factors to Consider
The first factor to consider is your personal preference. Do you like a thicker steak, with a juicy and medium-rare center? Or do you prefer a thinner cut that cooks quickly and offers a more well-done result? Knowing your preference is key in choosing the right thickness.
Another factor to consider is the cooking method you plan to use. Different methods require different thicknesses of steak to achieve optimal results. For example, grilling a thin steak may result in overcooking, while pan-searing a thick steak could lead to a raw center.
The type of steak you are cooking is also an important factor. Some cuts, such as ribeye or porterhouse, are naturally thicker due to their composition and bone structure. On the other hand, cuts like filet mignon or flank steak are usually thinner.
Popular Steak Thicknesses
Steaks come in various thicknesses, ranging from as thin as 1/2 inch to as thick as 3 inches or more. Understanding popular steak thicknesses can help guide your decision-making process.
For thinner cuts, steaks that are around 1/2 inch to 3/4 inch thick are popular. These steaks cook quickly and are ideal for methods like pan-searing or broiling.
Steaks that are 3/4 inch to 1 inch thick are considered medium thickness. They offer a balance between a quick cooking time and a juicy center, making them suitable for a range of cooking methods.
Thicker steaks, measuring 1 inch to 1.5 inches, are perfect for grilling or pan-searing. The extra thickness allows for a nice sear on the outside while maintaining the desired doneness inside.
For those who enjoy a larger steak, cuts that are 1.5 inches to 2 inches thick provide an indulgent experience. These steaks require a longer cooking time to ensure even heat distribution.
Steaks that measure 2 inches to 2.5 inches thick are considered extra thick. They are often reserved for special occasions or when you want to impress your guests with an extravagant meal.
If you’re feeling particularly adventurous, you can try cooking steaks that are 2.5 inches to 3 inches thick. These massive cuts require careful attention to ensure that the center reaches the desired doneness.
Matching Thickness to Cooking Method
Now that you have a better understanding of the different steak thicknesses, it’s essential to pair the right thickness with the appropriate cooking method to achieve the best results.
For steaks that are 1/2 inch to 3/4 inch thick, they are best suited for quick cooking methods such as pan-searing or broiling. These thinner cuts cook rapidly, so a shorter cooking time is required to avoid overcooking.
Steaks that measure 3/4 inch to 1 inch thick can be cooked using various methods, including grilling, pan-searing, or broiling. Their medium thickness allows for flexibility in cooking techniques.
Thicker cuts, ranging from 1 inch to 1.5 inches, are ideal for grilling or pan-searing. These methods provide the opportunity to achieve a delightful crust on the outside while maintaining the desired doneness within.
When it comes to steaks that are 1.5 inches to 2 inches thick, grilling is the recommended method. The thicker cut allows for a longer cooking time, resulting in a well-seared exterior and perfectly cooked center.
For those opting for extra thick steaks, measuring 2 inches to 2.5 inches, grilling is still the preferred method. However, it’s crucial to take caution and monitor the cooking time to prevent overcooking.
If you’re feeling up to the challenge of cooking a steak that measures 2.5 inches to 3 inches thick, grilling is once again the go-to method. However, it’s important to remember that these mammoth cuts require patience and precision to achieve the desired doneness.
Determining Doneness
Before diving into the various cooking techniques based on thickness, it’s important to understand how to determine the doneness of your steak. While personal preference plays a significant role, there are a few general guidelines to keep in mind.
The most reliable method to determine if your steak is cooked to the desired doneness is by using a meat thermometer. By inserting the thermometer into the thickest part of the steak, you can accurately gauge the internal temperature.
Alternatively, you can also rely on the touch test. With clean hands, gently press the center of the steak. If it feels soft and squishy, it is rare. If it feels more springy and firm, it is medium-rare. The firmer the steak, the more well-done it will be.
Lastly, you can use the visual cue method. By cutting into the steak and inspecting the color of the meat, you can roughly estimate the doneness. However, this method is less precise and may result in overcooking if not executed carefully.
Effect of Thickness on Doneness
The thickness of your steak directly affects the doneness you can achieve. Thicker steaks will have more variation in the gradient from the seared exterior to the center. This allows for a range of doneness levels, from rare in the center to medium or well-done at the edges.
Thinner steaks, on the other hand, have less room for variation in the gradient. They tend to cook quickly and have a more consistent doneness throughout, resulting in a more even and predictable level of doneness.
It’s important to consider this aspect when choosing the thickness of your steak, as it will impact the flavor and texture of your final dish. If you prefer a more uniform doneness, opt for a thinner steak. For those who enjoy a range of doneness within a single steak, thicker cuts are the way to go.
Grilling
Grilling is a favorite cooking method for many steak enthusiasts. The sizzle of the steak hitting the hot grill grates and the mouthwatering aroma it creates is enough to get anyone’s taste buds tingling. Let’s dive into the details of grilling a steak, including preparation, grilling time, and resting time.
Preparation
Before grilling your steak, it’s crucial to prepare it properly to ensure optimal flavor and tenderness. Start by allowing your steak to come to room temperature, as this promotes even cooking. Season your steak generously with salt and pepper or your choice of dry rub. You can also marinate your steak beforehand to enhance its flavor.
While your steak is reaching room temperature, preheat your grill to medium-high heat. Make sure the grill grates are clean and well-oiled to prevent sticking.
Grilling Time
The grilling time for your steak will vary depending on its thickness and your desired level of doneness. As a general guideline, for a 1/2 inch to 3/4 inch steak, grill each side for approximately 3-4 minutes for medium-rare doneness. For a medium thickness steak, like 3/4 inch to 1 inch, grill each side for around 4-5 minutes. Thicker cuts, such as 1 inch to 1.5 inches, will require 5-7 minutes per side for medium-rare. Adjust the cooking time accordingly if you prefer a different level of doneness.
During the grilling process, avoid flipping the steak too frequently. Allow each side to develop a nice sear before flipping it over. This helps to create those attractive grill marks and enhance the flavor.
Resting Time
After grilling your steak to perfection, it’s essential to let it rest before serving. Resting allows the juices to redistribute within the meat, resulting in a juicier and more flavorful steak.
For thinner cuts, a resting time of 5-10 minutes is sufficient. Thicker steaks may require a longer resting period of 10-15 minutes. Place your grilled steak on a cutting board and tent it loosely with aluminum foil to retain the heat and moisture.
Once the resting time is complete, it’s time to slice and serve your perfectly grilled steak. Remember to slice against the grain to ensure tenderness and enjoy the fruits of your grilling labor.
Pan-Searing
Pan-searing a steak is a fantastic option when grilling outdoors isn’t feasible. This method allows you to achieve a beautiful sear and lock in the juices of your steak. Let’s explore the steps involved in pan-searing, including preparation, searing time, oven finishing, and resting time.
Preparation
To prepare your steak for pan-searing, start by patting it dry with paper towels. Removing excess moisture from the surface of the steak helps promote a better sear. Season your steak generously with salt and pepper or your favorite steak seasoning. You can also add some minced garlic or herbs to infuse additional flavor.
Heat a cast-iron skillet or a heavy-bottomed frying pan on medium-high heat. Add a high smoke point oil such as vegetable oil or clarified butter to the pan and allow it to heat up until shimmering. The hot pan is crucial for achieving a nice crust on your steak.
Searing Time
Once your pan is hot, carefully place your seasoned steak onto the surface. Listen for the sizzle as the steak makes contact with the pan. Let the steak sear on one side without moving it for approximately 3-4 minutes. This allows for a proper crust formation.
After the first side has seared, use tongs to flip the steak to the other side. Allow it to sear for an additional 3-4 minutes. For thicker cuts, you can also sear the edges of the steak by holding it upright with the tongs.
Oven Finishing
If you prefer a more evenly cooked steak, you can finish it in the oven after searing. Preheat your oven to 425°F (220°C) and transfer the seared steak, still in the pan, to the oven. Use an oven-safe meat thermometer to monitor the internal temperature.
The cooking time will depend on the thickness of your steak and the desired level of doneness. As a general guideline, for a 1/2 inch to 3/4 inch steak, roast it in the oven for an additional 5-7 minutes. Thicker cuts, like 3/4 inch to 1 inch, will require 7-10 minutes. Adjust the cooking time to achieve your preferred doneness.
Resting Time
After finishing your steak in the oven or solely pan-searing it, it’s crucial to let it rest before slicing. Follow the resting time guidelines mentioned earlier, allowing the juices to redistribute and the steak to become more tender.
Place your pan-seared steak on a cutting board and cover it loosely with foil. This helps to retain heat and moisture. After the resting period, you can slice your steak and savor every delicious bite.
Broiling
Broiling is another excellent method for cooking steak, especially when you want to achieve a beautiful crust on top. This technique involves high-temperature cooking from above, resulting in a flavorful and charred exterior. Let’s delve into the details of broiling, including preparation, broiling time, and resting time.
Preparation
Preparation for broiling your steak is similar to other cooking methods. Start by seasoning your steak with salt, pepper, and any desired spices or herbs. Ensure that your steak is at room temperature before broiling, as this promotes more even cooking.
Preheat your broiler on the highest setting for about 10 minutes. While the broiler is preheating, place an oven rack close to the broiler element. This ensures that your steak is exposed to the intense heat, allowing for optimal searing.
Broiling Time
When your broiler is hot and ready, place your seasoned steak onto a broiler pan or a wire rack set over a baking sheet. Carefully position the pan on the rack closest to the broiler element.
The broiling time will vary depending on the thickness of your steak and the desired doneness. As a general guideline, for a 1/2 inch to 3/4 inch steak, broil it for approximately 2-3 minutes per side for medium-rare. Thicker cuts, such as 3/4 inch to 1 inch, will require 4-5 minutes per side. Adjust the cooking time to achieve your preferred level of doneness.
Resting Time
After broiling your steak, it’s essential to let it rest before slicing. Transfer the steak to a cutting board and tent it loosely with foil. This resting period allows the steak to retain its juices, resulting in a more succulent and flavorful final product.
For thinner cuts, a resting time of 5-10 minutes should suffice. Thicker steaks may require a longer resting period of 10-15 minutes. Once the resting time is complete, thinly slice your broiled steak and savor the tenderness and charred goodness.

Sous Vide Cooking
Sous vide cooking has gained popularity among home cooks for its ability to produce consistently tender and perfectly cooked steaks. This method involves immersing vacuum-sealed steaks in a water bath at a precise temperature for a prolonged period. Let’s explore the steps involved in sous vide cooking, including preparation, cooking time, and searing.
Preparation
To prepare your steak for sous vide cooking, start by seasoning it with salt, pepper, or any other desired spices and herbs. Place the seasoned steak in a vacuum-sealed bag or a heavy-duty freezer bag. Ensure that the steak is in a single layer, without any overlapping. Remove as much air as possible from the bag before sealing it.
Fill a large pot with water and attach a sous vide immersion circulator. Set the desired temperature according to the chart provided earlier for the thickness of your steak.
Cooking Time
The cooking time for sous vide steak depends on the desired level of doneness and the thickness of the steak. As a general guideline, for a 1/2 inch to 3/4 inch steak, cook it for approximately 1-2 hours. Thicker cuts, such as 3/4 inch to 1 inch, will require 2-3 hours. Adjust the cooking time based on the desired doneness.
Once the steak is cooked to the desired temperature, remove it from the water bath and pat it dry with paper towels.
Searing
After the sous vide cooking is complete, it’s essential to give your steak a quick sear to develop a flavorful crust. Heat a cast-iron skillet or a heavy-bottomed frying pan on high heat. Add a high smoke point oil, then carefully place your cooked steak onto the hot surface.
Sear the steak for approximately 1 minute per side, or until a golden-brown crust forms. Be cautious when searing, as the steak is already cooked and should only be seared briefly to avoid overcooking.
Once the searing is done, remove the steak from the pan and let it rest for a few minutes before slicing. The combination of sous vide cooking and a perfect sear will ensure an incredibly tender and delicious steak.
Reverse Searing
Reverse searing is a unique method that involves slow cooking the steak to the desired internal temperature, followed by a quick sear to develop a delectable crust. This technique ensures evenly cooked steak with a beautiful sear. Let’s explore the steps involved in reverse searing, including preparation, cooking time, and searing.
Preparation
To prepare your steak for reverse searing, generously season it with salt, pepper, or your preferred steak seasoning. Place the seasoned steak on a wire rack set over a baking sheet. This allows for proper airflow and even cooking.
Preheat your oven to 250°F (120°C) and position the wire rack with the steak inside. Slow cooking at a low temperature will ensure that the steak cooks evenly and retains its moisture.
Cooking Time
The cooking time for reverse searing will depend on the thickness of your steak and the desired level of doneness. As a general guideline, for a 1/2 inch to 3/4 inch steak, slow cook it in the oven for approximately 20-25 minutes. Thicker cuts, such as 3/4 inch to 1 inch or more, will require 30-40 minutes. Adjust the cooking time accordingly to achieve your preferred doneness.
During the slow cooking process, it’s essential to monitor the internal temperature of the steak using a meat thermometer. Aim for a temperature that is a few degrees below your desired doneness. This allows for the final searing step to bring the steak to perfection.
Searing
After slow cooking in the oven, it’s time to give your steak a quick and high-temperature sear to create a caramelized crust. Heat a cast-iron skillet or a heavy-bottomed frying pan on high heat. Add a high smoke point oil, such as vegetable oil or clarified butter.
Carefully transfer your cooked steak to the hot pan and sear it for approximately 1 minute per side. The aim is to achieve a Maillard reaction, resulting in a flavorful crust.
Once the searing is complete, remove the steak from the pan and let it rest for a few minutes before serving. The reverse searing method ensures a beautifully cooked steak with an irresistible sear.
Smoking
Smoking a steak adds a unique and smoky flavor profile that can elevate your culinary experience. This method requires a bit more time and attention, but the end result is worth the effort. Let’s explore the steps involved in smoking a steak, including preparation, smoking time, and resting time.
Preparation
To prepare your steak for smoking, start by seasoning it with your desired blend of spices, herbs, or a dry rub. The smoking process will infuse these flavors into the meat, so be generous with your seasoning.
Preheat your smoker to a temperature of 225°F to 250°F (107°C to 121°C). While the smoker is preheating, allow your seasoned steak to come to room temperature to ensure even cooking.
Smoking Time
The smoking time for your steak will depend on the thickness of the cut and the desired level of smokiness. As a general guideline, for a 1/2 inch to 3/4 inch steak, smoke it for approximately 1 hour. Thicker cuts, such as 3/4 inch to 1 inch or more, may require 1.5 to 2 hours. Adjust the smoking time based on your preferences.
During the smoking process, it’s important to maintain a consistent temperature within the smoker. This helps ensure an even and thorough cook.
Resting Time
After smoking your steak to perfection, it’s essential to let it rest before slicing and serving. Place the smoked steak on a cutting board and tent it loosely with foil. Allow the steak to rest for 10-15 minutes, giving the juices time to redistribute and the flavors to settle.
Once the resting time is complete, slice your smoked steak against the grain and enjoy the smoky goodness. Pair it with your favorite sides or sauces for a truly memorable meal.
Temperature Tips and Internal Doneness
Temperature plays a vital role in achieving the perfect steak. Whether you’re using a meat thermometer or relying on visual cues, it’s important to understand the ideal internal temperatures for each level of doneness. Let’s explore temperature tips and the ideal internal temperatures for a range of doneness levels.
Using a Meat Thermometer
A meat thermometer is a valuable tool for ensuring the accurate doneness of your steak. When using a thermometer, insert it into the thickest part of the steak without touching the bone, as the bone can affect the reading.
To achieve an accurate reading, leave the thermometer in the steak for a few seconds until the reading stabilizes. It’s important to remember that the internal temperature will continue to rise slightly during the resting period.
Ideal Internal Temperatures
The following are the ideal internal temperatures for various levels of doneness:
- Rare: 125°F to 130°F (52°C to 54°C)
- Medium-rare: 135°F to 140°F (57°C to 60°C)
- Medium: 145°F to 150°F (63°C to 66°C)
- Medium-well: 155°F to 160°F (68°C to 71°C)
- Well-done: 165°F and above (74°C and above)
These temperatures are a general guide, and personal preference may lead you to adjust them slightly. It’s crucial to remember that carryover cooking will occur during the resting time, resulting in a slight increase in temperature.
Carryover Cooking
Carryover cooking is the phenomenon that occurs after removing the steak from the heat source. During the resting period, the residual heat within the meat continues to cook the steak, resulting in a rise in internal temperature.
To account for carryover cooking, it’s recommended to remove the steak from the heat source when it is a few degrees below the target temperature. This allows the steak to reach the ideal internal temperature during the resting period.
By considering carryover cooking, you can consistently achieve your desired level of doneness and ensure a perfectly cooked steak.
In conclusion, choosing the right thickness for your steak is essential for achieving the perfect result. Factors such as personal preference, cooking method, and cut of steak all play a role in determining the ideal thickness. By following the guidelines provided and considering the various cooking techniques, you can elevate your steak-cooking game and be well on your way to steak perfection. So next time you’re at the butcher shop or ordering at a restaurant, take a moment to consider the thickness that will best suit your needs and cooking methods – your taste buds will thank you for it!