In “Steak Cooking Techniques: A Visual Guide,” you will discover a comprehensive collection of steak cooking chart pictures that will take your culinary skills to the next level. Whether you’re a seasoned grill master or a beginner in the kitchen, this visual guide will equip you with the knowledge and techniques needed to achieve the perfect steak every time. With step-by-step instructions and helpful visuals, you’ll be able to explore a variety of cooking methods and temperatures, unlocking the secrets to tender and flavorful steaks. Say goodbye to overcooked or undercooked steaks and elevate your grilling game with this essential tool for any steak lover.
Choosing the Right Cut of Steak
When it comes to enjoying a perfectly cooked steak, choosing the right cut is key. Each cut offers a unique texture and flavor profile, so it’s important to understand the different options before making your selection.
Understanding Different Cuts
There are several popular cuts of steak, each with its own characteristics and qualities. Here are a few common cuts you may come across:
-
Ribeye: Known for its marbling and rich, juicy flavor, the ribeye is a favorite among steak lovers. Its high fat content makes it incredibly tender and adds to its delicious taste.
-
Filet Mignon: Considered one of the most tender cuts, the filet mignon is known for its buttery texture and mild flavor. This lean cut is perfect for those who prefer a more subtle taste.
-
New York Strip: This cut, also known as a strip steak or sirloin, offers a balance between tenderness and flavor. It has a slightly firmer texture compared to the ribeye and a robust, beefy taste.
-
T-Bone: The T-bone steak combines two cuts in one – the tender filet mignon and the flavorful New York strip. It’s a great choice if you’re looking for the best of both worlds.
-
Porterhouse: Similar to the T-bone, the porterhouse steak also features both filet mignon and New York strip, but in larger portions. It’s perfect for sharing or those with a hearty appetite.
-
Sirloin: A budget-friendly option that still delivers great taste, the sirloin steak is known for its bold flavor and slight chewiness. It’s a versatile cut that can be enjoyed in various cooking methods.
Remember, the choice of cut ultimately depends on your personal preferences. Whether you prefer a tender, melt-in-your-mouth experience or a hearty, beefy bite, there’s a cut out there for you.
Factors to Consider When Choosing a Cut
While understanding the characteristics of different cuts is important, there are other factors to consider when making your decision. Here are a few key factors to keep in mind:
-
Budget: Some cuts, like filet mignon, tend to be more expensive due to their tenderness and popularity. Other cuts, such as sirloin, can be more budget-friendly options without sacrificing flavor.
-
Cooking Method: Different cuts respond differently to various cooking techniques. Some cuts, like ribeye, are ideal for grilling, while others, like filet mignon, are better suited for broiling or pan-searing. Consider how you plan to cook your steak and choose a cut that pairs well with your preferred method.
-
Thickness: Thicker cuts of steak require different cooking times and techniques compared to thinner cuts. Keep in mind that thicker cuts may take longer to cook and may require additional steps, such as searing or sous vide cooking, to ensure even doneness.
By taking these factors into account, you’ll be able to choose a cut that aligns with your taste preferences, cooking method, and budget.
Prepping the Steak
Once you’ve chosen the perfect cut of steak, it’s time to prepare it for cooking. Properly prepping the steak will enhance its flavor and texture, ensuring a delicious end result.
Trimming Excess Fat
Before cooking, it’s a good idea to trim any excess fat from the steak. While some fat is desirable as it adds flavor and moisture, excessive fat can lead to flare-ups on the grill or a greasy finished dish. Use a sharp knife to carefully remove any large pieces of visible fat, but be careful not to remove all of it, as a moderate amount of fat is essential for a flavorful steak.

Bringing the Steak to Room Temperature
Allowing the steak to come to room temperature before cooking is an important step that is often overlooked. This ensures that the steak cooks evenly, preventing the outside from overcooking while the interior remains undercooked. Simply take the steak out of the refrigerator and let it sit on the countertop for approximately 30 minutes before cooking.
Seasoning the Steak
Seasoning is another crucial step in prepping your steak. While some cuts, like the ribeye, have enough inherent flavor that they only require a simple sprinkling of salt and pepper, others may benefit from marinades or dry rubs. Experiment with different seasonings and flavors to find a combination that suits your taste buds. Just remember to season the steak just before cooking to retain the moisture and prevent it from becoming overly salty.
Different Cooking Techniques
Now that your steak is prepped and ready to go, it’s time to explore the various cooking techniques that will help you achieve the perfect doneness and flavor.
Grilling
Grilling is a popular technique for cooking steaks, as it imparts a delicious smoky flavor and creates a beautiful sear on the outside. Whether you’re using charcoal or gas, there are a few key considerations to keep in mind:
Direct vs. Indirect Grilling
Direct grilling involves placing the steak directly over the heat source, while indirect grilling involves positioning the steak away from the heat and cooking it with indirect heat. Direct grilling is ideal for thinner cuts or when you want a nice char on the outside, while indirect grilling is better for thicker cuts that require more time to cook.
High-Heat vs. Low-Heat Grilling
High-heat grilling involves cooking the steak over intense heat, which creates a crisp crust and seals in the juices. This method is recommended for thinner cuts, as it allows for quick cooking while still achieving a desired level of doneness. Low-heat grilling, on the other hand, involves cooking the steak over lower heat for a longer period, resulting in a more evenly cooked steak. This technique is suitable for thicker cuts or when you prefer a more gentle cooking process.
Grilling Time Based on Thickness
The cooking time for grilling steaks varies depending on the thickness of the cut. As a general guideline, cook thinner steaks (less than 1 inch thick) for 4-6 minutes per side for medium-rare, while thicker steaks (1-2 inches thick) will require around 6-10 minutes per side. Keep in mind that these are just estimates, and it’s always best to use a meat thermometer to ensure your steak reaches the desired internal temperature.

Broiling
Broiling is another popular cooking technique that can yield excellent results for steaks. It involves cooking the steak under high heat in the oven, similar to grilling. Here’s what you need to know about broiling:
Preparing the Broiler
To broil a steak, you’ll need to position the oven rack so that the steak is about 3-4 inches away from the heat source. Preheat the broiler on high for approximately 10 minutes to ensure it reaches the necessary temperature. Place the seasoned steak on a broiler pan or a wire rack set inside a baking sheet to allow for airflow and even cooking.
Broiling Time Based on Thickness
As with grilling, the cooking time for broiling will depend on the thickness of the steak. For thinner cuts (less than 1 inch thick), broil for 4-6 minutes per side for medium-rare. Thicker cuts (1-2 inches thick) will require around 6-10 minutes per side. Again, it’s crucial to use a meat thermometer to accurately determine the doneness of your steak.
Pan-Searing
Pan-searing is a versatile technique that allows you to achieve a flavorful crust without the need for an outdoor grill or broiler. It’s perfect for those times when you want to cook a steak indoors or when the weather doesn’t permit grilling. Here’s how to pan-sear your steak to perfection:
Choosing the Right Pan
To pan-sear a steak, it’s best to use a heavy-bottomed skillet or a cast-iron pan. These types of pans distribute heat evenly and retain it well, ensuring a consistent cooking temperature. Non-stick pans are not recommended for pan-searing, as they may not reach the high temperatures necessary for a proper sear.
Searing Time Based on Thickness
The cooking time for pan-searing also depends on the thickness of the steak. For thinner cuts (less than 1 inch thick), sear for 3-5 minutes per side for medium-rare. Thicker cuts (1-2 inches thick) will require around 5-7 minutes per side. Remember to let the steak rest for a few minutes after cooking, as this allows the juices to redistribute and ensures a moist, tender bite.
Sous Vide Cooking Technique
Sous vide, meaning “under vacuum” in French, is a cooking technique that involves sealing the steak in a vacuum-sealed bag and cooking it in a temperature-controlled water bath. This method allows for precise control over the doneness and texture of the steak. Here’s how to use sous vide to cook your steak:
Appropriate Sous Vide Temperature and Time
The appropriate temperature and cooking time will depend on the level of doneness you prefer. For a medium-rare steak, set the water bath to around 130°F (54°C) and cook the steak for 1-2 hours. For a medium steak, increase the temperature to 140°F (60°C) and cook for 1-3 hours. Once the steak is done cooking, it’s important to give it a quick sear on a hot skillet or grill to achieve a caramelized crust.
Post-Sous Vide Searing
After the steak is cooked sous vide, it can lack the appealing color and crust that traditional cooking methods provide. To rectify this, give the steak a quick sear in a hot skillet or over a high-heat grill for 1-2 minutes per side. This will add the desired color and texture to your perfectly cooked steak.
Smoking Techniques
Smoking is an excellent choice for those seeking to infuse their steak with a deep, smoky flavor. While it may require more time and effort, the results are well worth it. Here’s what you need to know about smoking your steak:
Choosing the Right Wood Chips
The choice of wood chips for smoking can greatly impact the flavor of your steak. Popular options include hickory, mesquite, applewood, and cherry wood, each contributing its own unique aroma. Experiment with different wood chip flavors to discover your favorite combination.
Smoking Time Based on Thickness
The smoking time for steaks will depend on the thickness of the cut and the desired level of doneness. As a general guideline, thinner cuts will require approximately 1-2 hours of smoking, while thicker cuts can take 2-4 hours. It’s important to monitor the internal temperature of the steak using a meat thermometer, aiming for an internal temperature of 125°F (52°C) for medium-rare.
Determining Steak Doneness
Achieving the perfect level of doneness is crucial to ensure a steak that meets your preferences. While cooking times can provide a guideline, the best way to determine doneness is to use a combination of a meat thermometer and visual indicators.
Using a Meat Thermometer
A meat thermometer is a valuable tool for accurate doneness assessment. Insert the thermometer into the center of the steak, avoiding contact with the bone if applicable. For medium-rare, aim for an internal temperature of 130-135°F, while medium steaks should reach 140-145°F. Keep in mind that the temperature will rise a few degrees during the resting period.
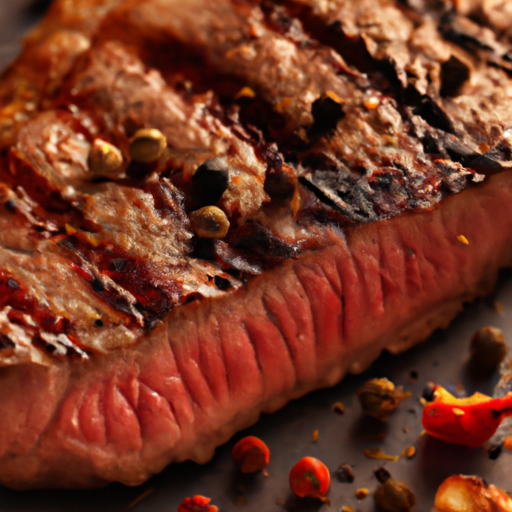
Visual Indicators
In addition to using a meat thermometer, visual indicators can help you determine the doneness of your steak. When cooked to medium-rare, the interior of the steak will have a warm pink center surrounded by a thin band of light pink. A medium steak will have a larger pink center with a wider band of light pink. Remember to practice and observe different levels of doneness to become familiar with visual indicators.
Resting and Carving the Steak
Once your steak has reached the desired level of doneness, it’s essential to allow it to rest before carving. Resting allows the juices to redistribute throughout the meat, resulting in a more flavorful and tender steak.
Resting Period
To ensure optimal results, let your steak rest for 5-10 minutes before slicing into it. This brief rest will allow the juices to evenly distribute, enhancing the overall taste and tenderness of the meat.
Carving Techniques
When it’s time to carve your steak, it’s important to follow a few key techniques to ensure slices that are both visually appealing and tender. Here are some tips for carving your steak:
-
Use a sharp knife: A sharp steak knife will ensure clean and precise cuts, preventing the meat from becoming shredded or torn.
-
Slice against the grain: Cutting against the grain of the meat will result in more tender slices. Identify the direction of the muscle fibers and slice perpendicular to them.
-
Cut thin slices: Thin slices will provide a more enjoyable eating experience, as they are easier to chew and offer a better mouthfeel.
By following these carving techniques, you’ll be able to present your perfectly cooked steak in a visually pleasing manner while preserving its tenderness and flavor.
In conclusion, choosing the right cut of steak, prepping it properly, and utilizing the right cooking techniques are essential for achieving a delicious and satisfying result. Whether you prefer the smoky flavors of grilling or the precise control of sous vide, there are various methods to suit your preferences. By understanding the different cuts, mastering the cooking techniques, and using both a meat thermometer and visual indicators to determine doneness, you’ll be well on your way to becoming a steak-cooking pro. So, grab your favorite cut of steak, fire up the grill or preheat your oven, and enjoy a mouthwatering steak that is sure to impress.